
Correct ironing of your iron-on pictures
You can apply your iron-on image using an iron or heat press.
You can achieve very nice results with an iron if you follow the instructions exactly.
The fabric should have as smooth a surface as possible and be heat-resistant.
First check what temperature your fabric can withstand. We recommend setting the iron to
2 points.
Before you use your customised iron-on pattern, test the iron-on process on a piece of fabric using the test pattern provided. Read the instructions completely before you start.

Briefly iron the garment first so that it is smooth and dry. Do not steam!

Place the foil with your picture on the fabric so that you can see the picture the right way round. The rough side with the print is at the bottom.

Place the protective paper supplied on top. You can also use baking paper.
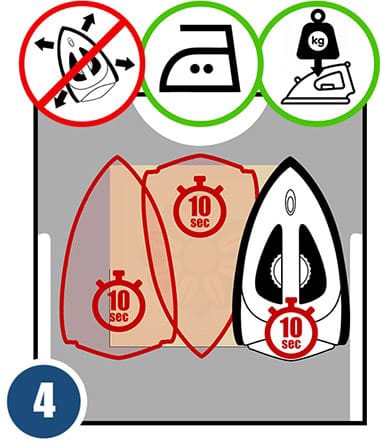
Depending on the type of fabric, select the highest possible ironing temperature (2 points). Press the iron firmly for 10 seconds without moving it. Make sure that the design is completely covered. For larger iron-on motifs, repeat the process until you have ironed on the entire motif.

After a cooling time of at least 2 minutes, you can carefully remove the foil. Caution: If parts of the iron-on image still adhere to the foil, put the protective paper back on and iron these areas as described above.

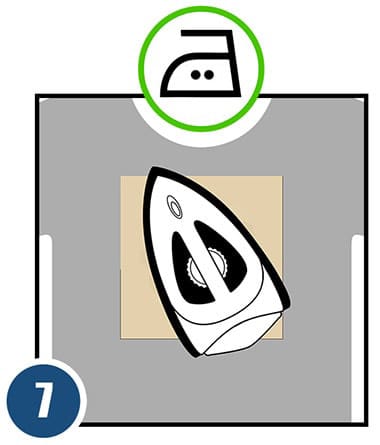
Finally, put the protective paper back on and fix your design once again with the iron (2 points).

Care instructions: Our iron-on images can withstand machine washes up to 40 degrees. It is best to wash and iron textiles with iron-on designs inside out.
